

My setup at home consists of various home automation devices. But the majority of my home lighting and power control is done by LightwaveRF. In my opinion this is one of the best options out there for somebody wanting to automate their home lighting and power. Their sockets and switches look excellent and don’t rely on massive plugged in devices (unless you opt for those).
Although the LightwaveRF App works fine on my iPhone i often find myself using multiple apps to control various devices and spend ages opening these apps, doing what i need then swapping to another. I wanted to add all my devices to Apples Home app which uses Homekit. Unfortunately LightwaveRF does not support homekit on Gen1 devices natively.
LightwaveRF have recently released a new Link and Gen2 switches which are compatible with Homekit, they also offer 2 way communication so your phone will know if a light is actually ON or OFF. But i don’t want to rebuy the 30+ devices i have, I’m not rich.
This article is for Gen1 users with a LW930 LightwaveLink (without display) The settings for the older LW500 with display are different. This guide will not work.
LightwaveRF LW930 – Link

Set a static IP to your lightwaveRF link
Unfortunately LightwaveRF don’t allow you to set a static IP to your device in the apps configuration. The easiest way to get around this is to set a DHCP reservation for lightwaveRF link on your router.
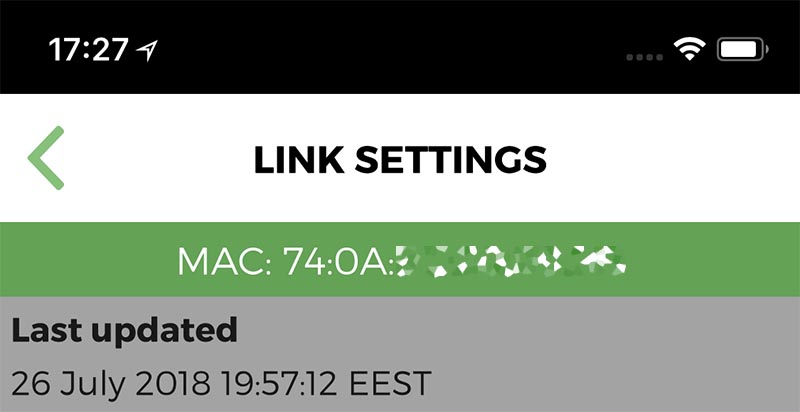
The MAC address of your Link can be found in your lightwaveRF app.
Settings>Lightwave link settings:
All routers are different please check your documentation how to do that.
You will need to restart your Link so it gets the new fixed IP.
Installation
1. To install your lightwaveRF plugin for homebridge you need to run the command from your server where you have homebridge installed
sudo npm install -g homebridge-lightwaverf
2. Once the installation is done you need to work on your config file.
If you followed my earlier tutorial your config.json should be located in /var/homebridge/config.json
If you didn’t you should find the config.json in your user directory.
Username – Should be the MAC address of your servers ethernet port and this must not change.
Pin – This is the pin you use when connecting to homebridge in the Apple Home app you can set this to whatever you like.
IP Address – This must be the IP address of your Link, please set a static IP.
There are 2 devices set in the example. They each have room name you can set to whatever room it is and the device name is the name of the switch/device.
The deviceId and the roomId must be set correctly i will explain how you find these out next.
The Device type must be set as below:
Light: “deviceType”: “L”
Dimmable Light: “deviceType”: “D”
Switch: “deviceType”: “S”
GarageDoor: “deviceType”: “G”
WindowCovering: “deviceType”: “WC“
{
  "bridge": {
    "name": "Homebridge",
    "username": "CC:22:xx:xx:xx:xx",
    "port": 51826,
    "pin": "xxx-xx-xxx"
  },
  "description": "Description of your server",

  "platforms": [{
    "platform": "LightWaveRF",
    "name": "LightWaveRF",
    "ip_address": "10.0.x.xx",
    "devices": [{
        "roomId": 1,
        "roomName": "LivingRoom",
        "deviceId": 1,
        "deviceName": "MySwitch",
        "deviceType": "S"
      },
      {
        "roomId": 1,
        "roomName": "LivingRoom",
        "deviceId": 1,
        "deviceName": "MyLight",
        "deviceType": "D"
      }
    ]
  }]
}
You can add more devices buy simply copying the device section and adding it after the trailing }
,{
        "roomId": 1,
        "roomName": "LivingRoom",
        "deviceId": 1,
        "deviceName": "MyLight",
        "deviceType": "D"
      }
Once you’ve added extra devices always check your changes in a JSON validator as discussed here
Finding your roomName and deviceId
There are a few different ways to find this information. Other articles may suggest reading the source code of webpages on your LightwaveRF account. I found these are not always correct and you will waste your time finding out which light/device it actually is controlling.
By far the easiest and my preferred way is to use Wireshark to listen to the UDP responses that the Lightwave Link transmits. This way you know the correct ID, first time.
Once you’ve installed Wireshark on a pc/device on the same network/wifi you need to monitor your ethernet/wifi connection and filter for the IP address of your Link and UDP packets only.
ip.addr == 192.168.xxx.xxx && udp
Start the recording and send some commands from your lightwave APP on your phone.
You should receive packets back that look like below:
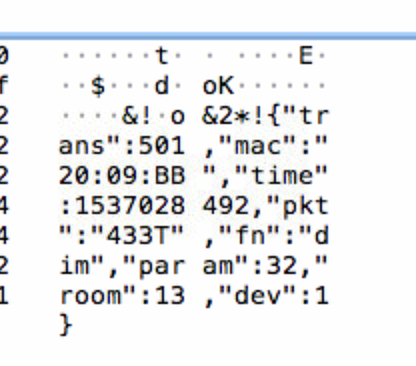
This was my shed light. So from this packet i can see that the “room” is 13 and the “device(dev)” is 1 and i know that the device is a dimmer so the config for this device would be as follows:
,{
        "roomId": 13,
        "roomName": "Outside",
        "deviceId": 1,
        "deviceName": "Shed",
        "deviceType": "D"
      }
Although it’s time consuming digging the packets of every device, it’s nowhere near as time consuming as guessing your way through them, uploading the config and testing. This way you know you’re right.
The packet received is actually a JSON response to your command from the link, here is what it looks like in the proper order:
*!{
    "trans":1,
    "mac":"03:45:67",
    "time":1420070400,
    "pkt":"433T",
    "fn":"on",
    "room":1,
    "dev":1,
    "param":16
}
If you want to find out more about lightwaveRF’s API you can view their instructions here.
Once you’ve set up all your devices save your config.json on your server and start homebridge. It should run without errors if your JSON was valid. It will also show the active devices for homebridge-lightwaverf.
Next you need to pair the homebridge server to your link which will be in a separate article to cut down the information overload you might be having!
Some caveats
Using lightwaveRF with homebridge and homekit does have some drawbacks which in my option are not massive but you need to know about them.
You (as yet) can’t control any heating devices
The communication is one-way (to the device) so even though your Home app might show the light is ON, it has no way to actually detect that is it, or isn’t. So you might have to press the button twice so it “synchronises” itself
Can you use the lightwave RF switches with homebrige to control say a sonoff relay or a phillips hue bulb